How to Install Different Types of Retro Chroma Table Lamps
Retro Chroma table lamps are designed to be as close to “plug and play” as possible. Most require no tools to assemble. Depending on the structure of the lamp and shade, you’ll typically see one of four common attachment types: Spider, Clip-On, Uno, and Screw-On.
Here’s how to install each one safely and correctly.
1. Installing Spider Shades
Spider shades have an internal frame with several arms that meet at a center ring. This ring sits on a metal harp and is usually secured with a decorative finial on top.

Steps:
-
Place the lamp on a stable, dry surface and make sure it is unplugged.
-
Attach the metal harp to the lamp base if it is not already installed.
-
Position the shade so that the spider fitter (center ring) rests on top of the harp.
-
Screw the finial onto the top of the harp to secure the shade.
-
Screw in a compatible bulb, then plug in and turn on the lamp.
2. Installing Clip-On Shades
Clip-On shades attach directly onto the bulb using a wire clip. They’re often used for small table lamps or candle-shaped bulbs.
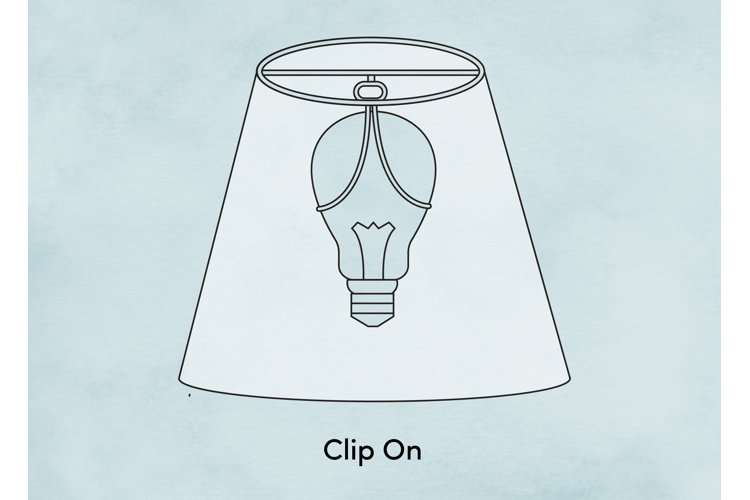
Steps:
-
Screw in the correct bulb first. We recommend using low-wattage or LED bulbs to avoid overheating.
-
Align the clip inside the shade with the center of the bulb.
-
Gently press the shade so the wire clip grips the bulb evenly.
-
Adjust the shade so it sits straight, then plug in and switch on the lamp.
3. Installing Uno Shades
Uno shades have a metal ring that fits directly onto the socket or around the bulb area. They are common on reading lamps and many vintage or mid-century designs.

Steps:
-
Ensure the lamp is unplugged and placed on a stable surface.
-
Locate the Uno ring inside the shade.
-
Slide the ring over the socket or into the designated position according to the lamp’s structure (some fit at the base, others near the top).
-
Once the shade is seated securely, screw in the bulb if needed.
-
Plug in the lamp and check that the shade is stable and not wobbling.
4. Installing Screw-On Shades
Screw-On shades use a threaded ring or decorative nut to hold the shade in place on the socket.
Steps:
-
Remove the existing threaded ring or decorative nut from the socket area.
-
Place the shade’s center opening over the socket or mounting point.
-
Reattach and tighten the threaded ring or nut to secure the shade.
-
Screw in a compatible bulb, then plug in and turn on the lamp.
Safety Notes
-
Always unplug the lamp and allow it to cool before installing or changing a bulb or shade.
-
Use only bulbs that match the base type and maximum wattage specified on the product page or rating label.
-
Keep the lamp away from moisture, heat sources, and flammable materials.